How to install TameFinder on macOS
Download TameFinder, extract the file, and authorize it from Privacy & Security if macOS asks.
A quick guide to install TameFinder on macOS and open it for the first time.
1. Download TameFinder
Download the macOS version of TameFinder.
2. Extract the file
Open the downloaded .zip file. Then move TameFinder Lite.app to Applications, or to the folder where you keep your work apps.
3. Open TameFinder
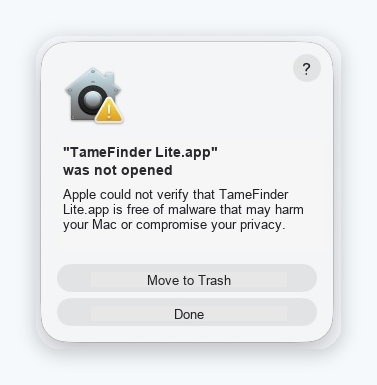
Double-click TameFinder Lite.app.
If macOS shows this warning, click Done.
4. Open System Settings
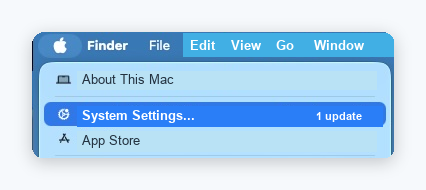
Open the Apple menu in the top-left corner and choose System Settings.
5. Authorize TameFinder
Go to Privacy & Security, scroll to the Security section, and click Open Anyway next to the TameFinder Lite message.
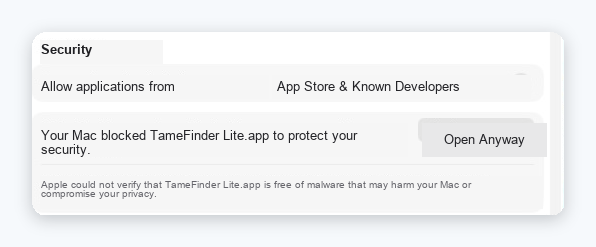
macOS may ask for another confirmation or for an administrator password.
6. Open TameFinder again
Go back to TameFinder Lite.app and open it again.
If you do not see Open Anyway
- Make sure you tried to open the app at least once.
- Check that you are in Privacy & Security, in the Security section.
- If you use a work Mac, some settings may be managed by your administrator.
- Download the file only from the official TameFinder page.
Apple source
Apple documents this flow in its official guide: Open a Mac app from an unknown developer.